



How to fix a rejected DoorDash menu photo
SUMMARY
When DoorDash flags an item photo, start with the order a customer would actually receive. A bowl of mushroom pasta gives you a way to spot extras that could be mistaken for part of the meal. Use the edge of the bowl and the size of the exported file to decide whether a crop will work or whether to plate another serving. Then check the corrected photo against the rejection notice and send it back for review on the right listing.
Stillmore Team
Contents
Start with the reason DoorDash gives for the specific menu item. A crop can remove a stray object at the edge of an otherwise sharp, accurate photo. If the camera missed focus, the serving is wrong, or part of the dish is already out of frame, photograph a fresh order before resubmitting.
Quick version
- Find the rejected item and write down what DoorDash flagged.
- Compare the picture with one standard order from your kitchen.
- Try a landscape crop on a copy, or reshoot the dish.
- Check the exported file and submit it against the same menu item.
Before you start
Have the rejection email, the current menu description and the original camera file handy. Open the photo on a screen large enough to inspect the food at full size. If all you have is a screenshot from a social post, ask whoever took the picture for the original. That one request can save you from plating another order.
Fix the item photo
Step 1: Find the reason attached to your dish
Open Menu Manager in the DoorDash Merchant Portal. Look for the rejection notice, choose View items, and open the affected item. Keep its name and the reason beside you as you work. If your restaurant sells both a pasta entrée and a pasta lunch combo, copy the full listing name so you can return to the right one.
Write down what you will check first. For a mismatch, pull up the description and check the order contents. For a framing issue, open the full camera file and look for the edges of the portion. You should be able to point to the item and name the issue before editing. DoorDash’s guide to rejected menu photos
Step 2: Match the picture to one order
Ask the cook what goes into the bag when someone orders the item at its listed price. Lay out that order and compare it with the photo. A sandwich listed on its own gets its own picture. If the listing sells the sandwich, fries and drink together, show the bundle. Check quantities too. A photograph of two sandwiches makes the wrong promise even when both are the right flavor.
Try the same check on the mushroom pasta below. If the listing is for the bowl alone, would a customer assume the glass or the extra cheese comes with it? For your own shot, move separately sold extras off the table before you pick up the phone. Ask a colleague who hasn't read the description what they expect to receive. Their answer should match the ticket.
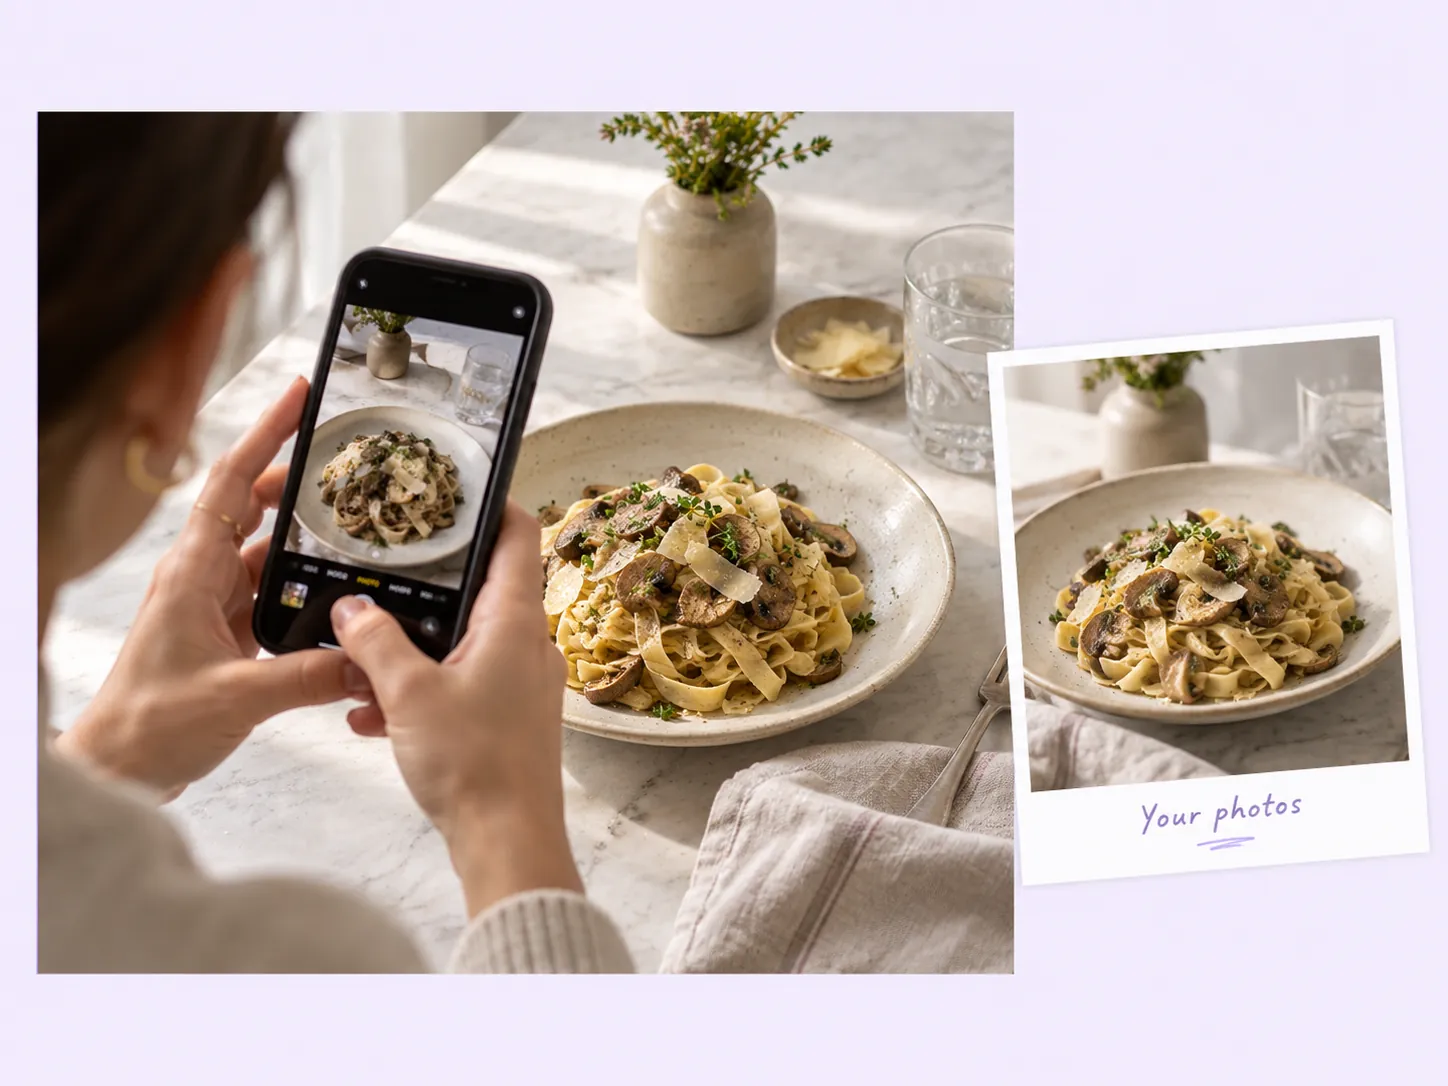
Illustration from Stillmore’s From Source to Serve example. Use your restaurant’s own photograph for the submission.
Step 3: Test a crop or photograph a fresh serving
Duplicate your original and try a horizontal 16:9 crop. Suppose a glass you sell separately just enters at the far right. Move the crop inward until the glass disappears. Look at the opposite edge and the bottom of the bowl. If you can still see the serving, judge its size and pick out the ingredients, save the crop and inspect the exported dimensions. DoorDash lists a minimum of 1400 × 800 pixels. A 1600 × 900 export from a sufficiently large original meets both the shape and dimension checks.
If the glass overlaps the pasta, the forkful in front is sharp but the bowl is blurry, or cropping cuts away part of the order, set the plate up again. Put it on a plain counter near even light. Hold the phone horizontally, tap the food to focus, and leave space around the rim. Take a second shot a little farther back while the dish is still ready. Open both at full size and keep the one that shows the portion clearly after cropping.
Step 4: Check the exported file and resubmit
Reopen the file you intend to upload. Check its pixel dimensions and the file limit displayed for the item upload. Look for an old price banner or a border left over from a social post. Compare the image one last time with the rejection reason you saved. Give it a recognizable filename such as mushroom-pasta-single.jpg so a teammate can tell it apart from the combo photo.
Return to the affected listing in Menu Manager, choose Add new photo, and upload the corrected file for review. Check the item name and image in the submission, and keep the filename with your note. After DoorDash approves the photo, open the customer-facing menu and check that the replacement appears under the intended dish.
Common mistakes
- Starting from the last export. A compressed square image may already have lost the edges of the plate. Open the full camera file before deciding whether a reshoot is necessary.
- Using the prettiest serving from a shoot. An extra topping that costs more can misrepresent the base order. Plate the version the customer gets at the listed price.
- Editing a photo you cannot use. A crop cannot resolve a rights issue. Choose a picture you took or own the rights to and can identify as your restaurant’s actual dish.
Frequently asked questions
Can I use the same photo for two pasta dishes?
Give separately listed dishes their own photos when the ingredients or preparation differ. Mushroom pasta and chicken pasta deserve separate images even if the portion, bowl and sauce look similar.
What if the only photo I have is vertical?
Look for another original from the same shoot. If you have to cut off the serving to make the frame horizontal, take a new landscape photo while the next order is on the counter.
Can I use a picture from our social feed?
Find the underlying photo your restaurant owns. Check that the serving is still current and export a clean copy without promotional graphics. Keep the designed post for your social feed.
What should I do if the corrected photo is rejected again?
Read the latest reason on the item and compare it with your submission note. If you still cannot identify the issue, give Merchant Support the exact listing name, the reason and the file you submitted so they can review the same case.
Keep a clean original
Save the full-size dish photo alongside the submitted crop. If you later want to show the preparation of your house special on social media, the uncropped file gives your team more room to work with. Explore restaurant video examples when you plan that separate post.

About the author
Stillmore Team
Stillmore is an advertising creative agency for independent businesses. The studio team produces promotional images, videos, and captions from your business photos.
Give them a reasonto stop by.
Send us your phone photos. Get posts ready to share.
See what we can make
Keep exploring
All stories ↗- How it works
How to photograph a shiny product label without glare
A reflection can show the curve of a jar or hide the words a customer came to read. Two photographs of the same Nutella product show the difference. Use them to judge a bright streak on your own packaging, then try a pair of shots beside a window. The guide walks through keeping the label square, checking one line at phone size, and choosing between a tighter crop and a fresh photo before you send the files to an editor.
- How it works
How to make a store tour video from photos
Learn how to turn current photos of your store into a brief for a tour video. This guide covers planning a visitor’s route, choosing entrance and interior photos, recording accurate business details, and handing the materials to Stillmore’s team. It includes a photo checklist, an example creative brief and a review checklist for the finished work. See where a cinematic tour differs from an exact walkthrough, what the published Grand Tour materials guide asks for, and what to check in the video and caption before publishing from your own social account.